Connections
note
This information is only relevant for Admins managing a Playground Private Exchange.
Overview
Playground can be connected to following git based version control systems to keep your code safe under your IP. This makes sure that you always have control over your code even if you are not planning to use Playground in future.
Currently, Playground supports:
- Bitbucket
- Github (Beta)
Setup Bitbucket
Bitbucket provides a flexible way to configure different workspaces for a different stream of work. Playground takes leverage of this concept of workspace & always encourages creating a new one to segregate all Playground generated repositories & separate them from the actual project or product related ones.
Below are the steps to create a workspace & enable it with Playground platform.
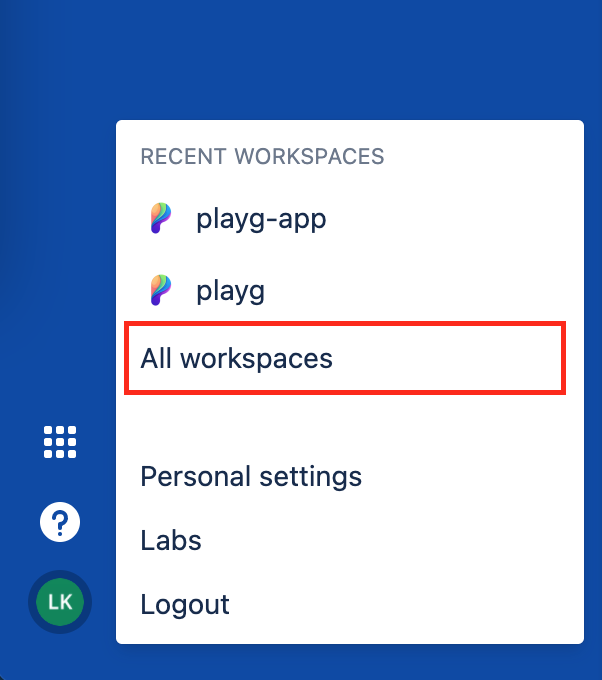
1. Create a New Workspace
Click on initials in the bottom-left corner of the sidebar to access workspace options.
note
Workspace name is open & can be set to anything. We recommend to set it as Playround to make it more obvious for other users.
Bitbucket will create a Workspace Id for this as shown in the above image. This Workspace Id is one of the parameters that will be used in setup later.
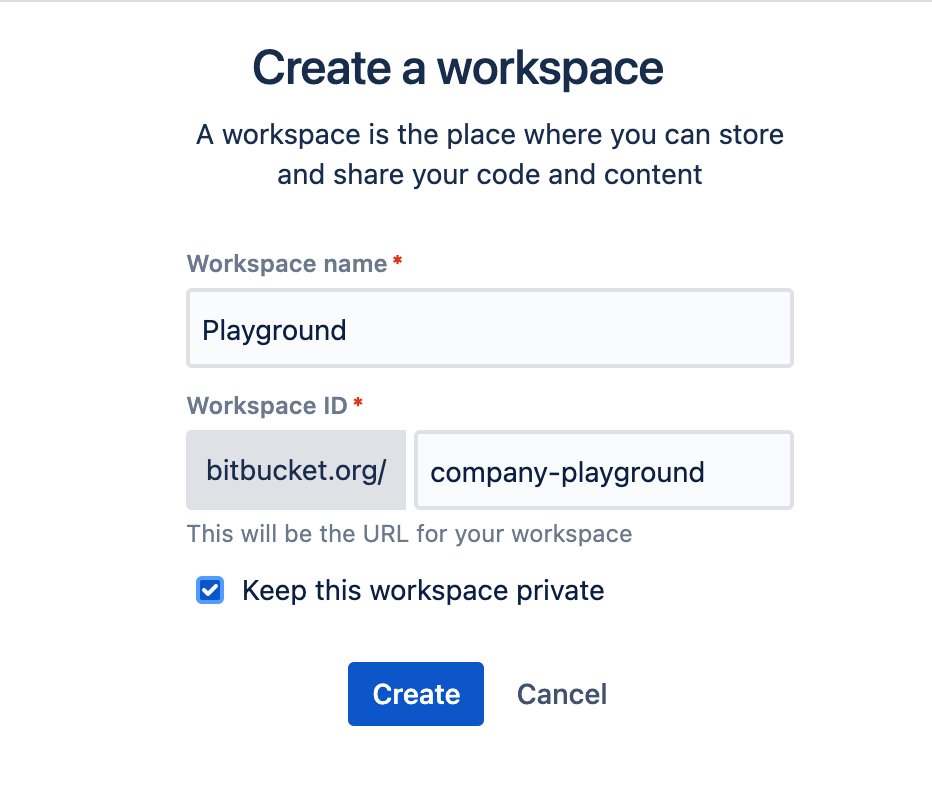
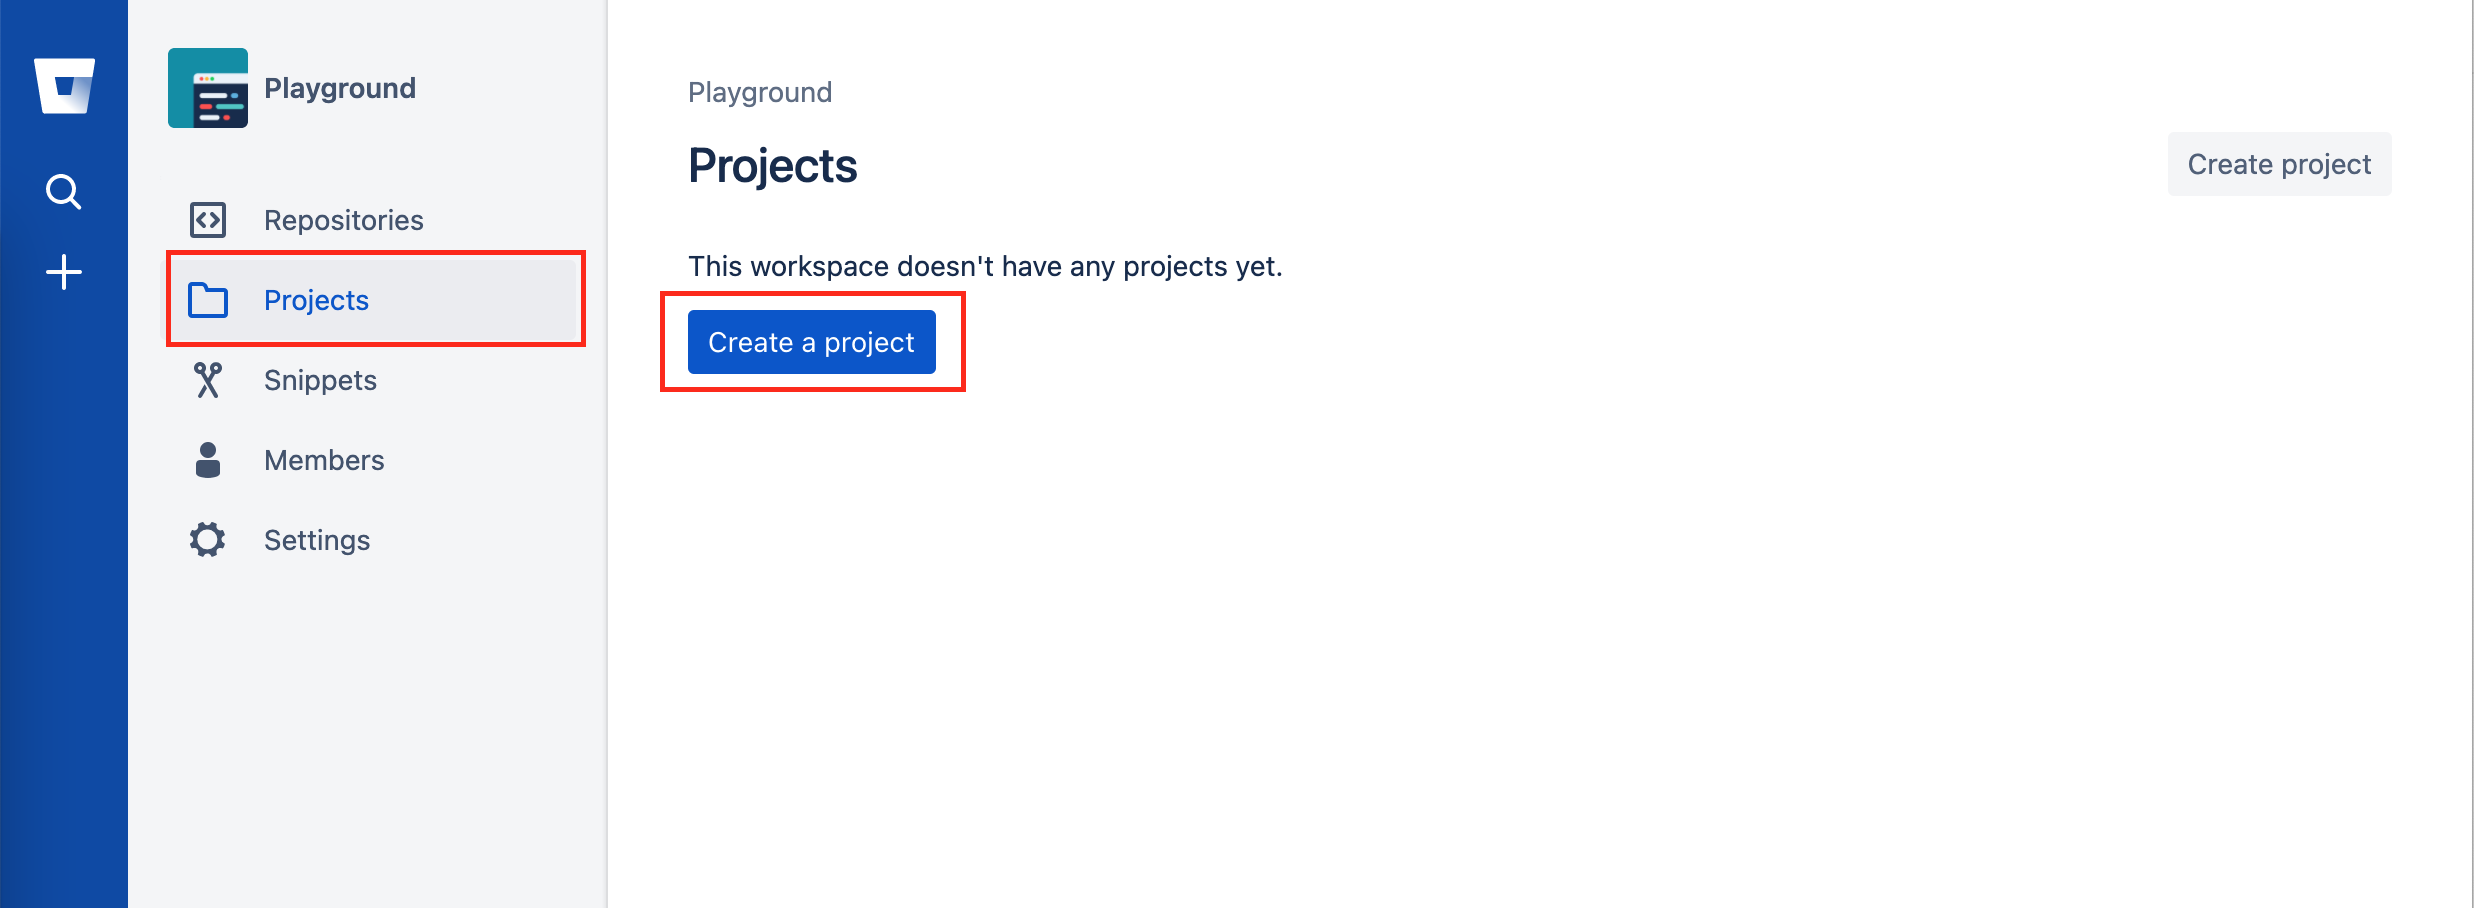
2. Create a New Project
For further segregation, Bitbucket has concepts of Projects wherein users can create multiple projects for further segregation. Since, we are only connecting one Playground platform with bitbucket, let's create a single project at this point.
note
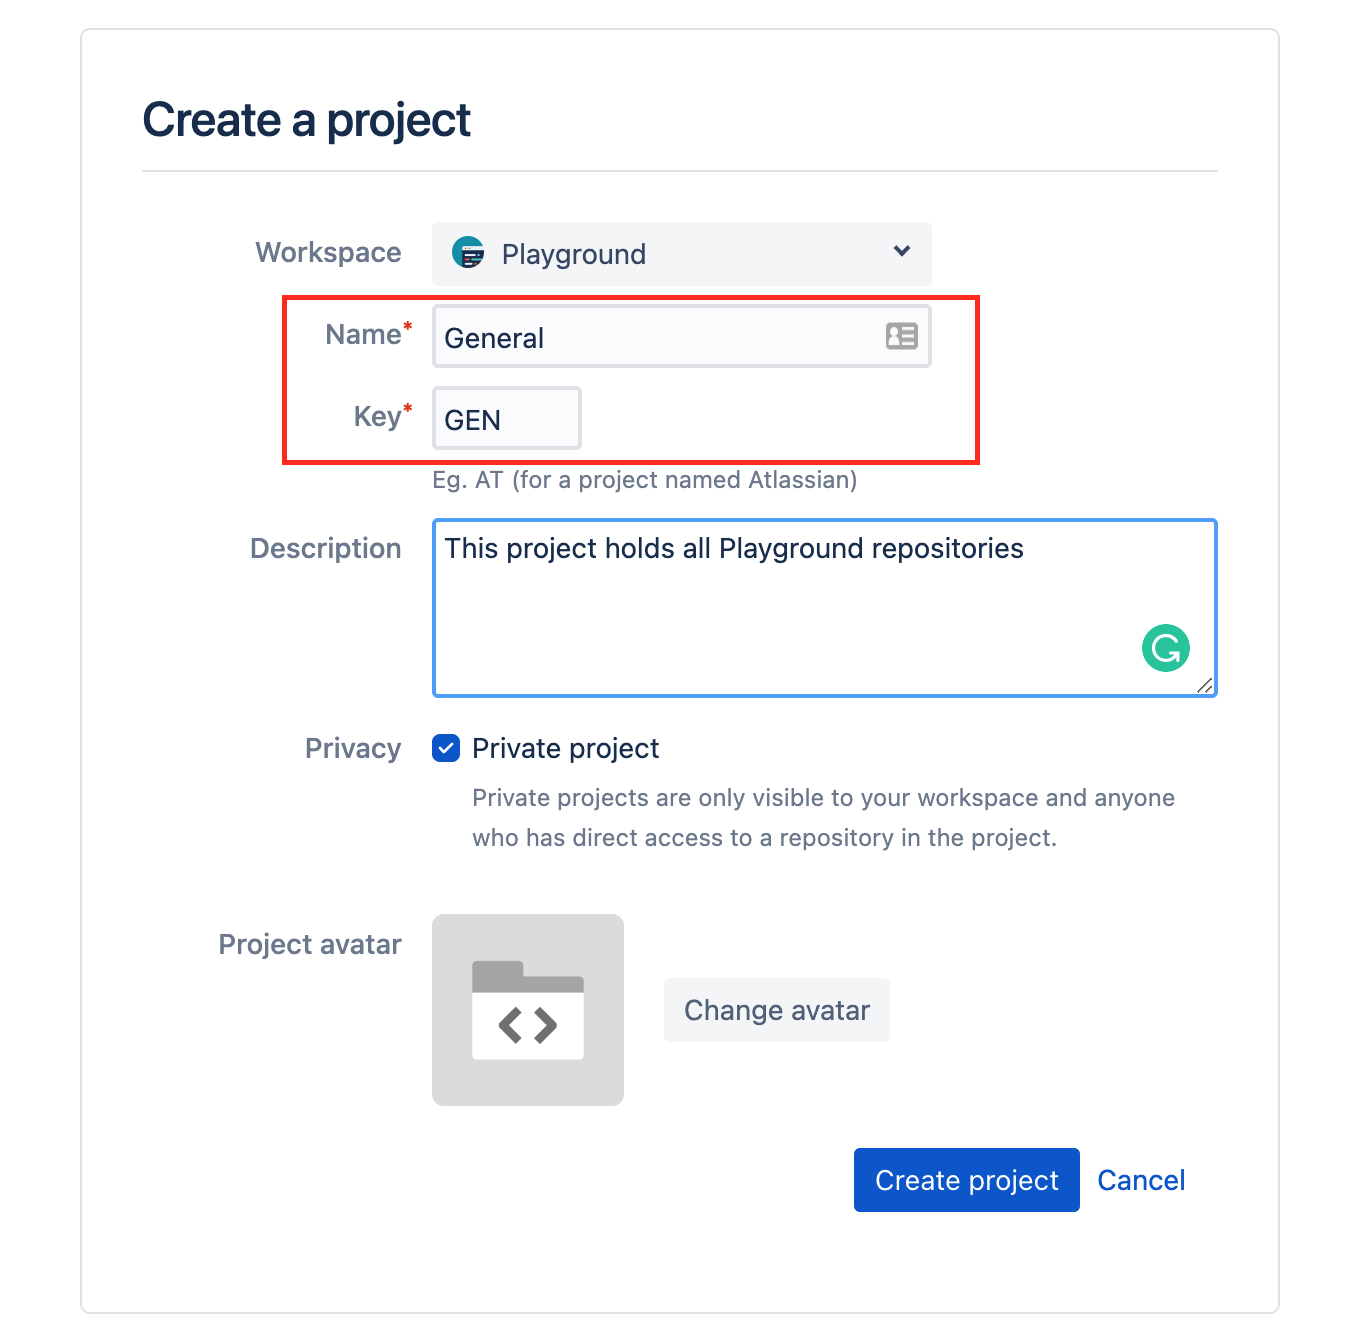
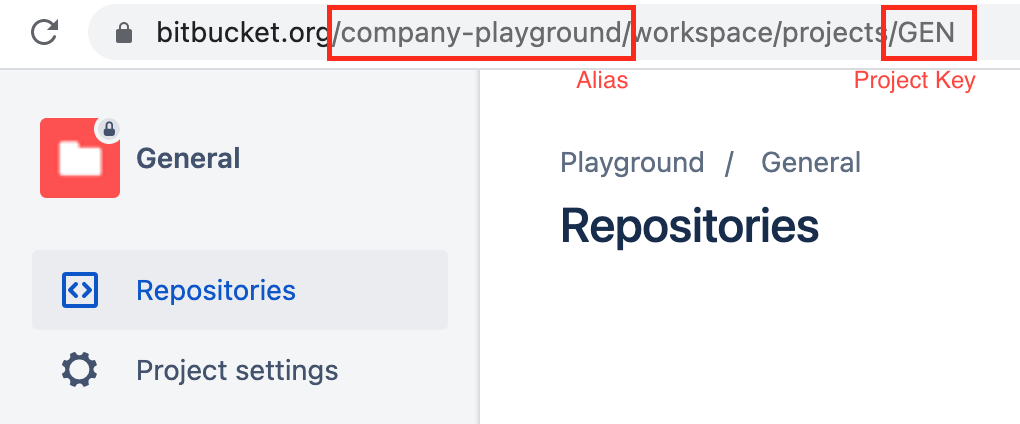
Once the project is created, Bitbucket will redirect to the project page. Here we will fetch all the information from the url generated in the browser as shown in the above image.
Keep note of following things from url:
Workspace Idwhich isAliasKeywhich isProject Key
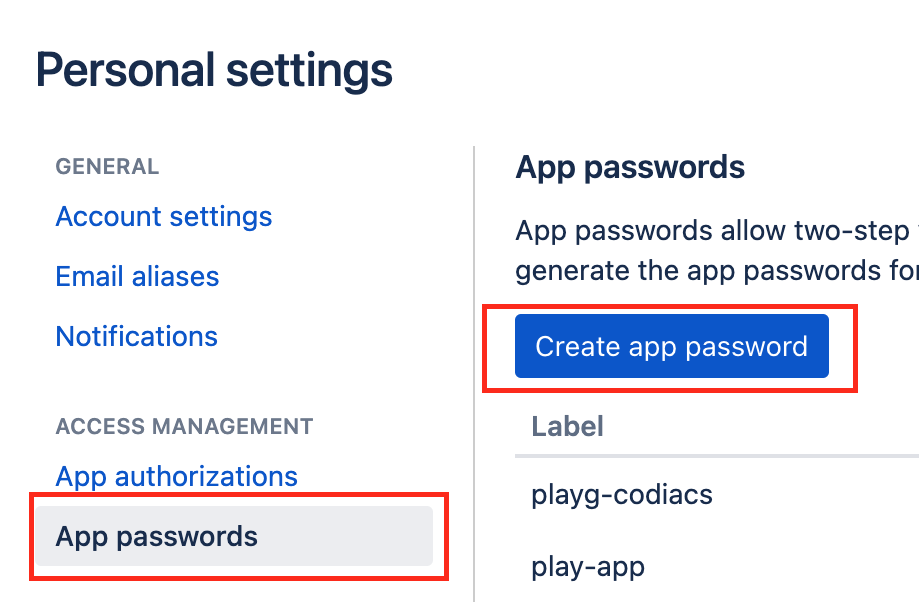
3. Generate App Password for Bitbucket
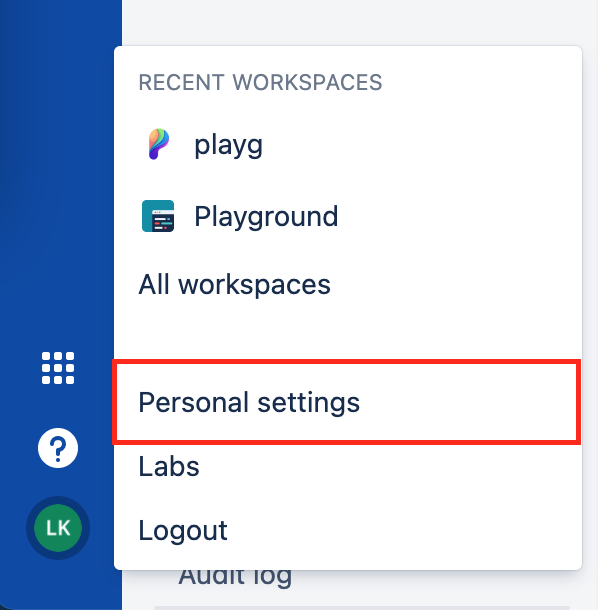
Click on initials again in the bottom-left corner of the sidebar to access personal settings to generate an app password.
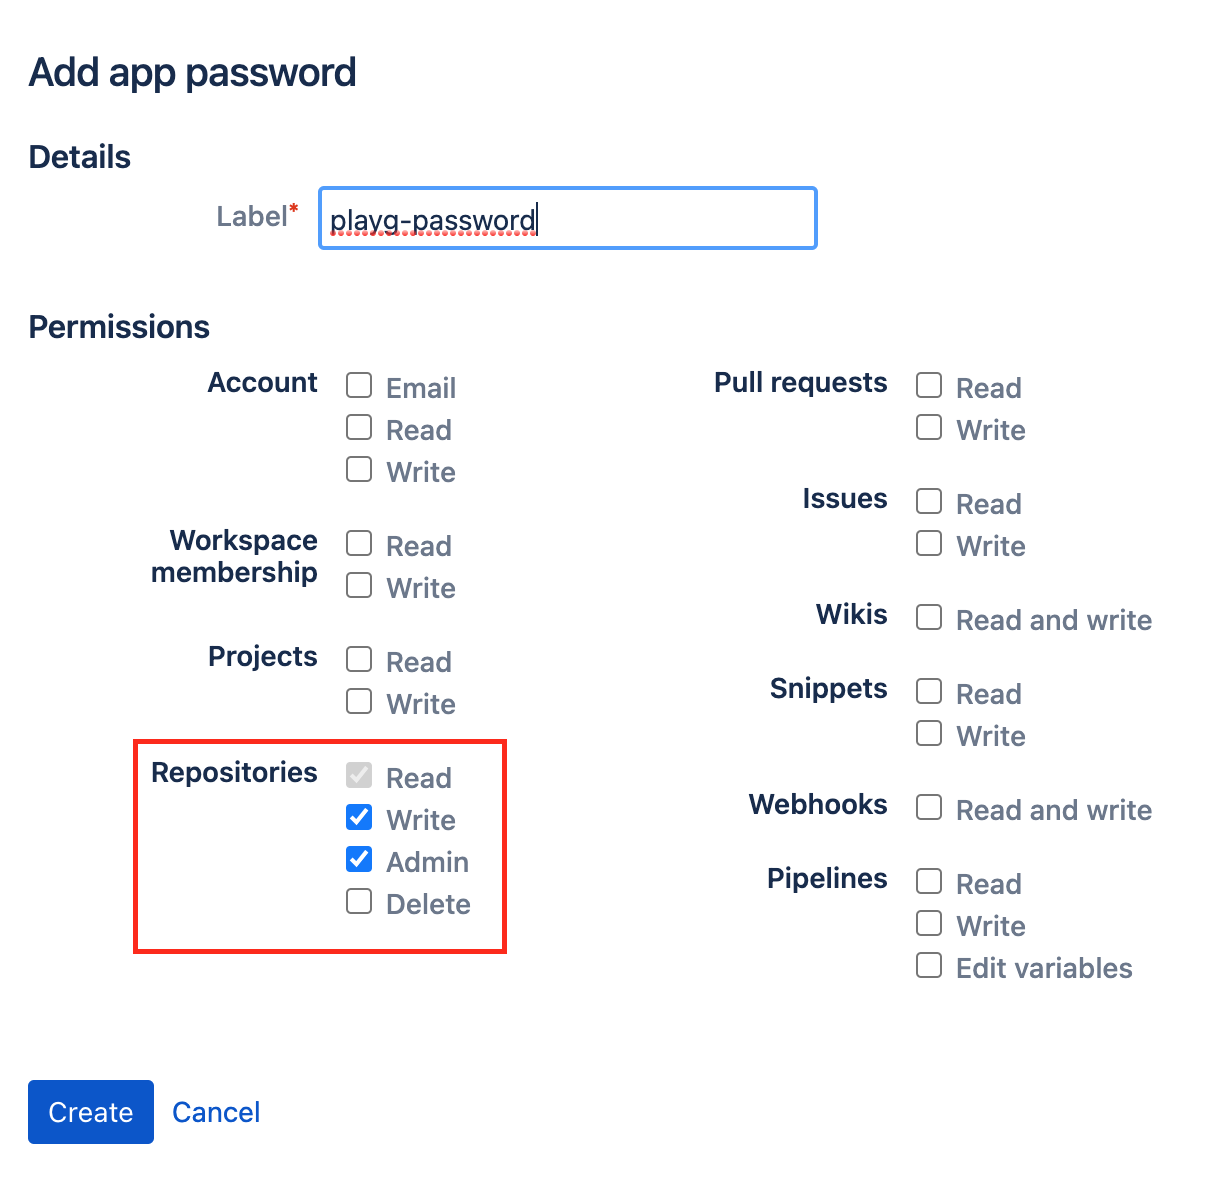
Playground only need below permissions to manage, create & edit repositories through platform (also shown in the image below)
- Repositories: Admin
- Repositories: Read
- Repositories: Write
note
Once app password is created, Bitbucket will show it temporarily. Please make a note of this password as it will be used in next section.
4. Enter Details in Connection Section
Once you have completed all steps in Bitbucket, put all of the information on connections section of control panel as shown in the image below.
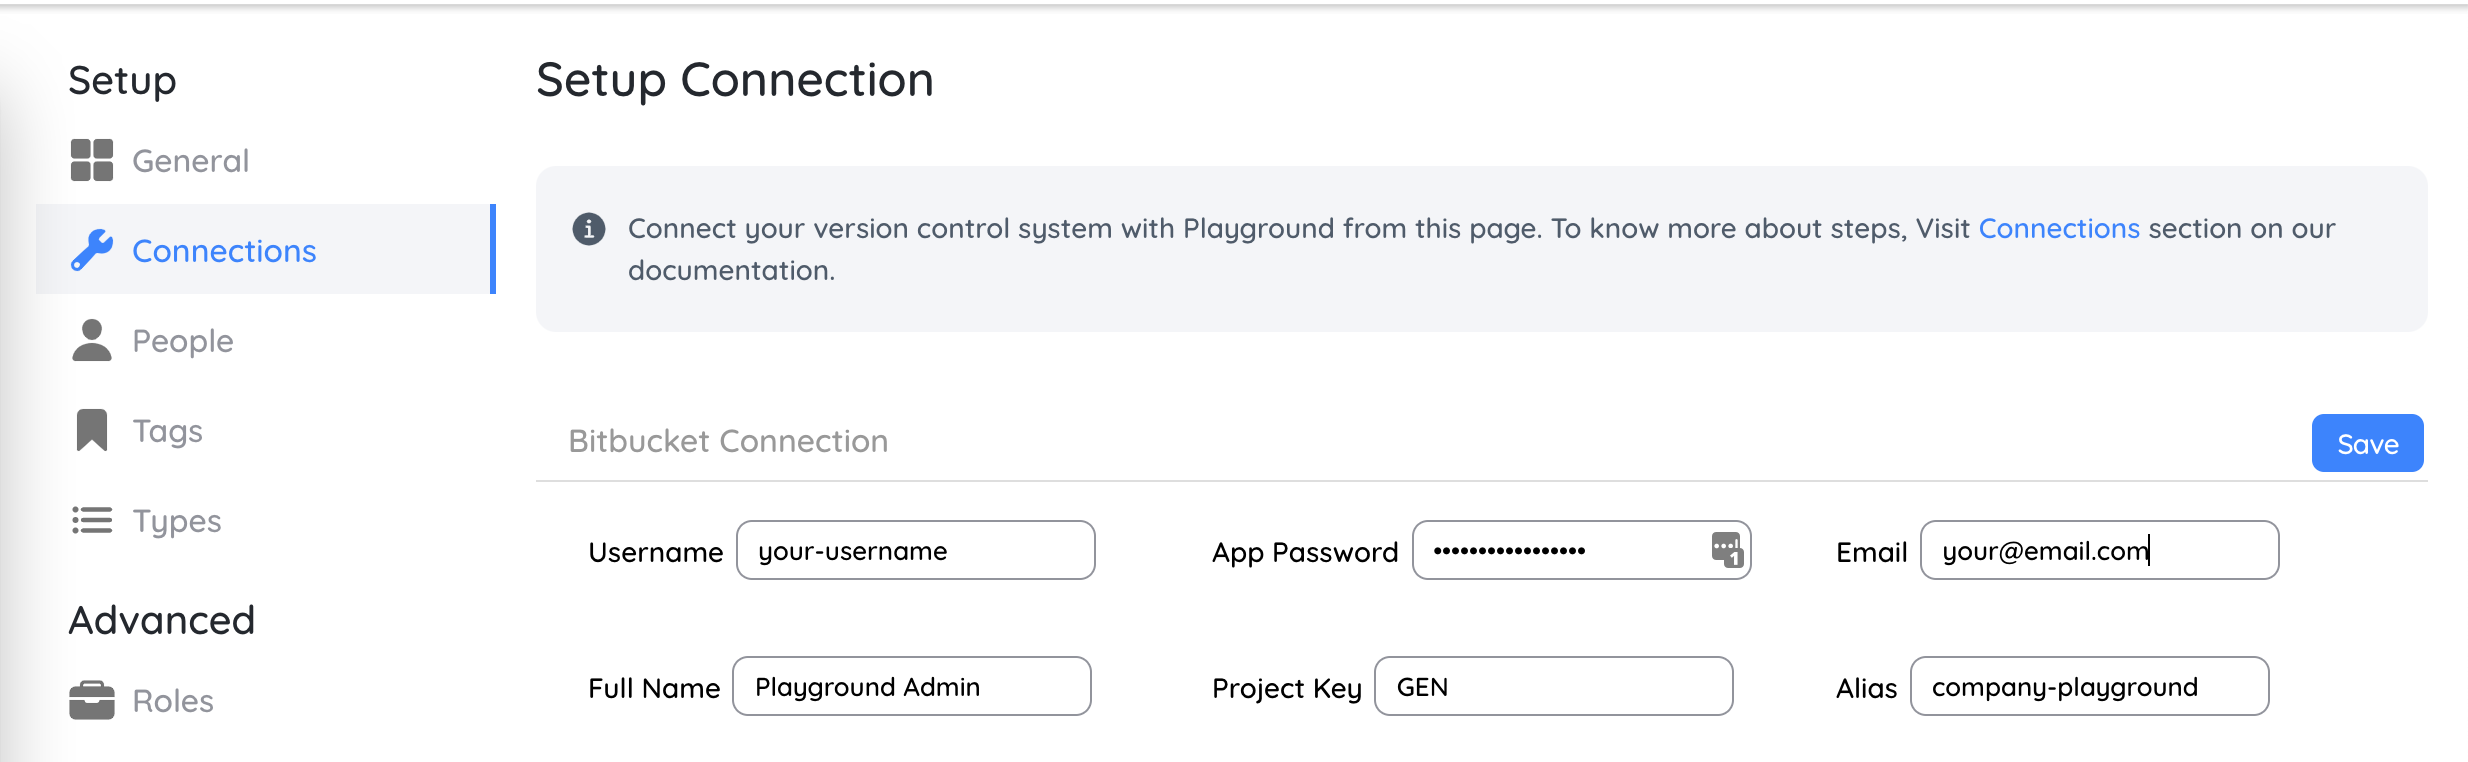
Just to iterate, Playground asks for six parameters to configure Bitbucket properly. These are:
- Username: Your Bitbucket username used to login.
- App Password: App password generated as part of step 3 above.
- Email: Your Bitbucket email attached to your user.
- Full Name: Name with which all commits should appear in Bitbucket for all Playground activity. Use
Playground Adminto make it more obvious - Project Key: Project key gathered in step 2 from the generated url.
- Alias: Workspace id gathered in step 2 from the generated url.
note
Once App password is setup on this screen, it is being used in the background & never get exposed through UI.
All these details are stored securely in encrypted state in the database and gets decrypted only when needed. To know more about it, Visit our Security Overview page in this documentation
5. Test Connection
To test the connection, try creating a play with the steps mentioned in this document with https://lkat-playg@bitbucket.org/lkat-playg/pg-demo.git as public git url.
If a play is successfully created, your connection is complete & tested.
Setup Github
Github is in Beta mode at the moment & not currently enabled to set through UI. If you wish to use Github as your version control system with Playground, Please contact us at info@playg.app